Development / ROBLOX
Roblox Studio checkpoints: a separate practice obby
Build two checkpoints, assign a respawn destination per player, and check death, repeated contact, ordering and leaving the session.
 Open full-size image ↗
Define the small mechanic first #
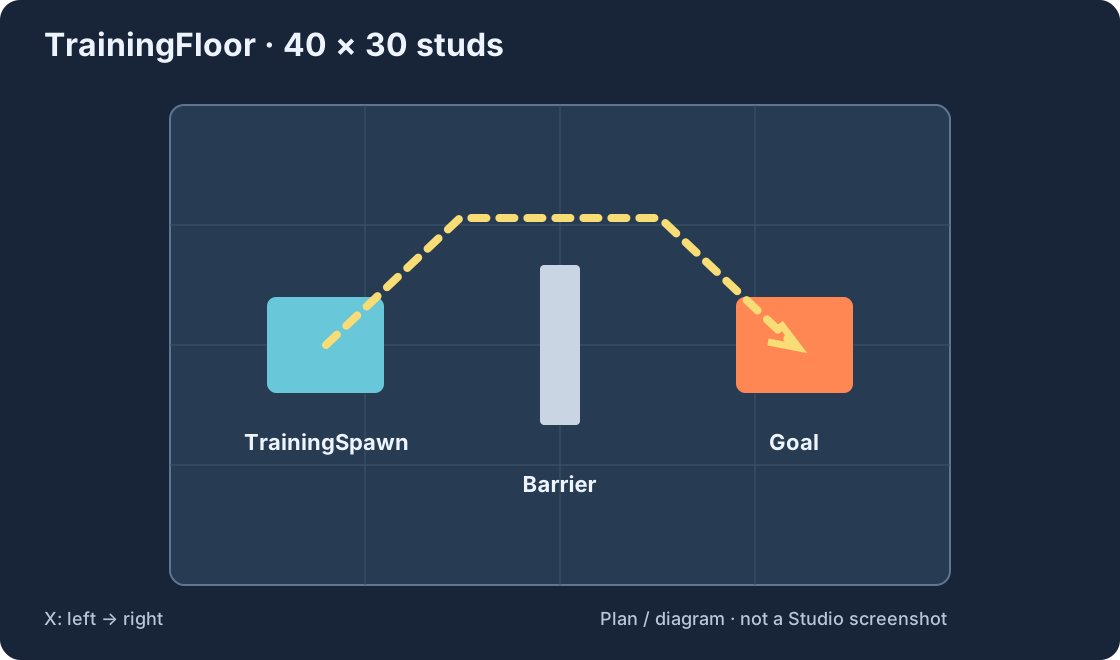
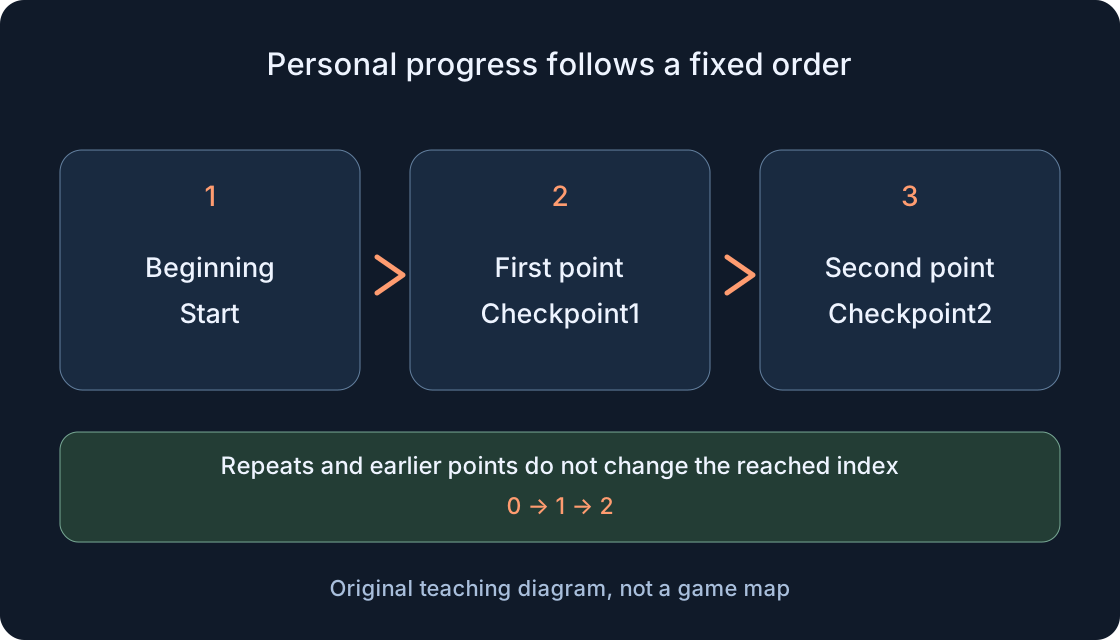
Build a short training path with Start, Checkpoint1 and Checkpoint2. A player reaches them in order. After accepted contact with the next checkpoint, death should return that character there. Walking back to an earlier platform must not reduce progress. A second player has an independent path state and respawn destination. This contract gives you an expected result to compare with what actually happens.
This is a new practice prototype, not an implementation from Stone Trail or another site-owner game. The script below is original to this lesson. Its logic is reviewed here, but it has not been run in the Roblox engine for this article. Progress exists only in the current server’s memory. We do not add cross-visit saving, rewards or protection against every possible route bypass. Verify the narrow mechanic before extending it.
1. Prepare a separate scene with exact names #
Save a new small project so the exercise does not interfere with a working game. Workspace needs one SpawnLocation named Start and one Folder named Checkpoints. Inside that folder, create two SpawnLocations named Checkpoint1 and Checkpoint2. Add an ordinary Script named CheckpointServer in ServerScriptService. The final paths are Workspace.Start, Workspace.Checkpoints.Checkpoint1, Workspace.Checkpoints.Checkpoint2 and ServerScriptService.CheckpointServer. Spelling matters: Checkpoint 1 with a space is a different name.
Other path platforms may be ordinary anchored Parts. Checkpoints must actually be SpawnLocations, not similarly coloured Parts. Remove unrelated extra spawns from this new exercise scene. Do not insert a collection of unknown model scripts: your own platforms and one server file are enough. Before adding logic, confirm that all three spawn platforms are visible and do not overlap. The basic scene should be easy to inspect without a difficult obstacle course.
2. Configure contact and clear spawning space #
Place Start, then Checkpoint1, then Checkpoint2 along a short safe path. Separate them enough that each can be touched independently. Leave clear space above each SpawnLocation so the character does not appear inside a wall, under a low ceiling or on an unsafe edge. Colour and a label help distinguish platforms but do not assign progress. A demanding trap is unnecessary for the first pass through the mechanic.
The table below gives this exercise’s configuration. The script repeats the required settings at startup. All spawns permit non-team-specific spawning, while changing teams on contact is disabled. CanTouch allows contact events, and Anchored keeps the platform in place. Introducing teams or collision groups later creates a different configuration: check spawn eligibility and physical contact again. For now keep the standard automatic character-loading behaviour enabled; custom loading is outside this prototype.
| Property | Value | Purpose in this exercise |
|---|---|---|
| Class | SpawnLocation | Spawn and respawn platforms |
| Anchored | true | Platforms stay fixed |
| CanCollide | true | Character can stand on the platform |
| CanTouch | true | Physical contact can be detected |
| Enabled | true | Spawn is available |
| Neutral | true | No team-specific restriction |
| AllowTeamChangeOnTouch | false | Contact does not change teams |
3. Put the complete script on the server #
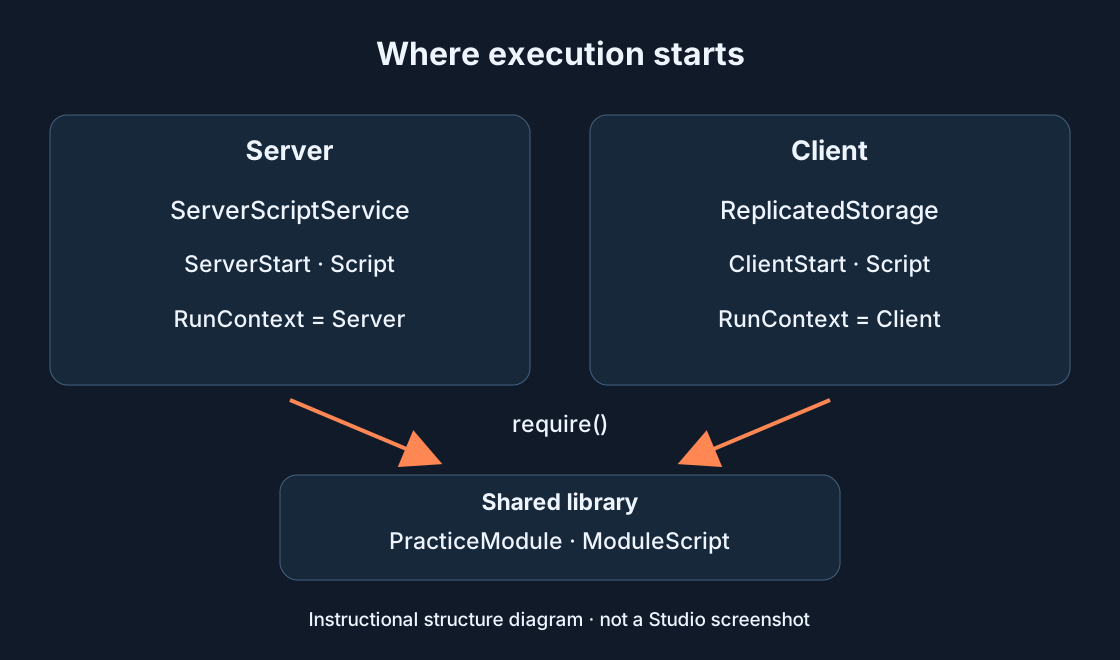
Open CheckpointServer in ServerScriptService and replace its contents with the complete example below. Copy the setup and initialization as well as the Touched handler. The checkpoints table fixes the order of two objects; it does not rely on GetChildren returning a particular order. configure checks object classes and assigns settings. WaitForChild waits for missing names, while assert reports an incorrect class. Repair the hierarchy before testing the route.
The server assigns Player.RespawnLocation and owns progress keyed by Player. A LocalScript in StarterPlayerScripts is not an equivalent placement for this exercise. Avoid another script that also changes RespawnLocation during the test. Start a fresh session after preparing the scene. Inserting this code into an already running test does not immediately move a living character to Start: it assigns a future respawn destination, rather than issuing a teleport command.
local Players = game:GetService("Players")
local start = workspace:WaitForChild("Start")
local folder = workspace:WaitForChild("Checkpoints")
local checkpoints = {
    folder:WaitForChild("Checkpoint1"),
    folder:WaitForChild("Checkpoint2"),
}
local progress = {}

local function configure(spawn)
    assert(spawn:IsA("SpawnLocation"), "Expected SpawnLocation")
    spawn.Anchored = true
    spawn.CanCollide = true
    spawn.CanTouch = true
    spawn.Enabled = true
    spawn.Neutral = true
    spawn.AllowTeamChangeOnTouch = false
end

configure(start)
for _, checkpoint in ipairs(checkpoints) do
    configure(checkpoint)
end

local function initialize(player)
    if progress[player] ~= nil then return end
    progress[player] = 0
    player.RespawnLocation = start
end

Players.PlayerAdded:Connect(initialize)
Players.PlayerRemoving:Connect(function(player)
    progress[player] = nil
end)
for _, player in ipairs(Players:GetPlayers()) do
    initialize(player)
end

for index, checkpoint in ipairs(checkpoints) do
    checkpoint.Touched:Connect(function(hit)
        local character = hit:FindFirstAncestorOfClass("Model")
        if not character then return end
        local player = Players:GetPlayerFromCharacter(character)
        if not player or player.Character ~= character then return end
        local humanoid = character:FindFirstChildOfClass("Humanoid")
        if not humanoid or humanoid.Health <= 0 then return end
        local current = progress[player]
        if current == nil or index ~= current + 1 then return end
        player.RespawnLocation = checkpoint
        progress[player] = index
    end)
end
4. Identify the player behind a touching part #
Touched supplies the other part. That could belong to a character, a falling cube or another object. The handler finds the nearest Model, asks GetPlayerFromCharacter whether it represents a player, compares player.Character, then checks for a Humanoid with positive Health. Without these conditions, an object or dead character could incorrectly affect progress. Invalid contacts return before any respawn destination is assigned.
The example assumes an ordinary character with its Humanoid inside the character Model. A custom nested rig needs a deliberately adapted model lookup; do not delete player validation merely to silence a symptom. A server-observed touch is not proof of legitimate route completion. Character movement and physics need a separate security analysis. Here the goal is correct personal checkpoint behaviour on a normal, small training path, not a complete anti-cheat system.
5. Enforce order without blocking other players #
A new player starts with progress 0. Only index current + 1 is accepted: first 1, then 2. After the first checkpoint, another foot or body-part contact with that same platform no longer matches the next index. After checkpoint 2, touching checkpoint 1 also fails the rule. It prevents both rollback and skipping the first platform. This is our chosen exercise contract; a freely ordered route would need a different rule.
There is no shared debounce that locks out every player after one person touches a platform. Each Player is a separate table key. The check and two assignments contain no task.wait or other yield. Players can advance independently. This is a logical review of the short handler, not a guarantee for later asynchronous code. Adding rewards, data requests or delays requires a new review of repeat calls and the timing of state changes.
6. Separate death from restart and rejoining #
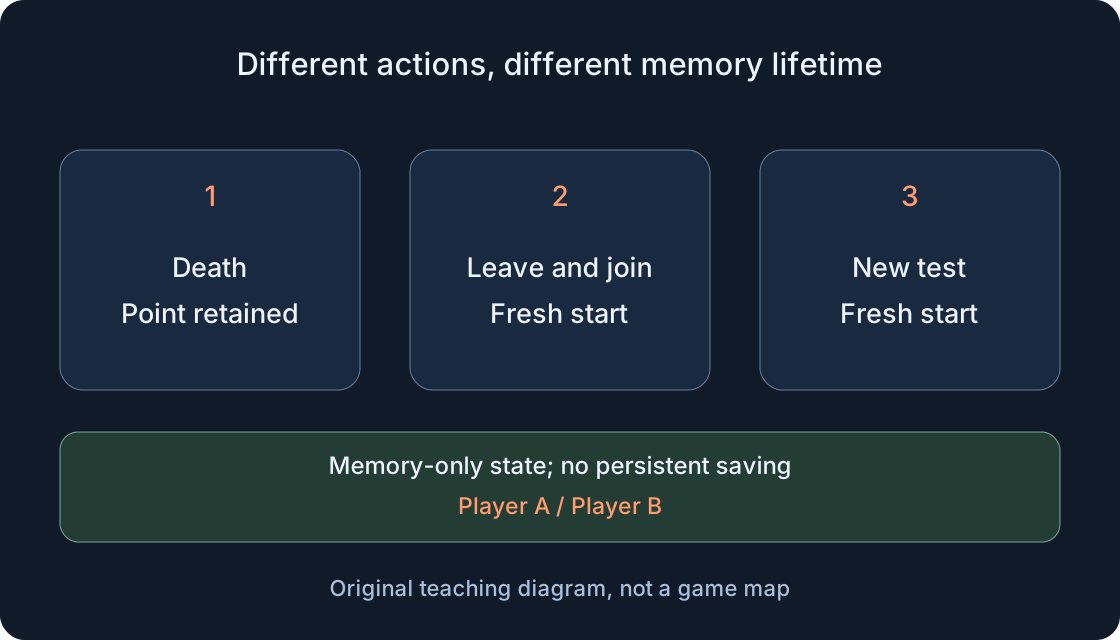
Accepted contact updates that Player’s RespawnLocation. The living character remains where it was; you verify the assignment on the next normal respawn. Death creates a new character Model, while the Player remains in the session and keeps its progress entry. Do not reset progress in CharacterAdded, because doing so would erase the checkpoint after every death.
PlayerRemoving deletes the memory entry on leaving. Rejoining initializes fresh progress 0 and assigns Start. Stopping a Studio test and launching a new one also starts a fresh session. This example has no in-game full-reset button. If you later add one, specify that it resets both the index and RespawnLocation; changing a label alone is insufficient. Saving the project stores the scene and script, not the player table’s runtime memory.
 Open full-size image ↗
7. Run the solo sequence deliberately #
Choose Test in Studio’s testing dropdown and start the playtest. This mode inserts a character. Run simulates without an avatar and is unsuitable for the first walking check. Begin a new session and confirm spawning at Start. Walk normally to Checkpoint1, stop on it, then arrange a death on a separately designed falling area in the practice prototype. Wait for normal respawning and record its location.
Repeat at Checkpoint2. Afterwards physically return to the first checkpoint and check death again: checkpoint 2 should remain selected. Do not confuse that experiment with Stop followed by a new Test, which intentionally clears memory. Record the actual result separately from the prediction. If the chosen falling area does not kill the character, that is not yet a failed RespawnLocation test. First establish that death and a new character spawn really occurred.
8. Try an object, a skipped point and repeat contact #
In a separate attempt, touch Checkpoint2 before Checkpoint1. The order condition should retain Start. Then complete both points normally. For an object check, create an ordinary unanchored cube and let it physically fall onto a checkpoint. It does not correspond to a Player and should not modify anyone’s progress. Compare through server state or the intended player’s later respawn, rather than interpreting the platform’s colour.
Touched depends on physical movement. Setting CFrame so two anchored parts overlap is not an equivalent contact-event test. If no event occurs, check CanTouch on both parts and any collision-group rules. Do not publish an invented “cube rejected” result before running the experiment. The case table later lists expected outcomes, not a report that this code has already completed a Roblox-engine test. Keep these distinctions in your own test notes as well.
9. Test two players with different progress #
Select Server & Clients with two clients, then press Play or F7. Player A reaches checkpoint 1 while B remains at Start. After death, A should respawn at Checkpoint1 and B at Start. Next B completes the first point while A completes the second; compare both outcomes. Also try near-simultaneous contact with checkpoint 1 by both characters. A shared lock must not leave one player without their own progress.
Seeing the same coloured platform in two cameras is insufficient evidence. A Workspace object’s colour is shared, while RespawnLocation belongs to a particular Player. Record which client performed the action and which character respawned. Use End Session to close the entire multi-client session afterwards. Two local clients check specific cases; they do not establish large-server performance, support for custom avatar hierarchies or protection from every unusual contact sequence.
10. Diagnose one failed condition at a time #
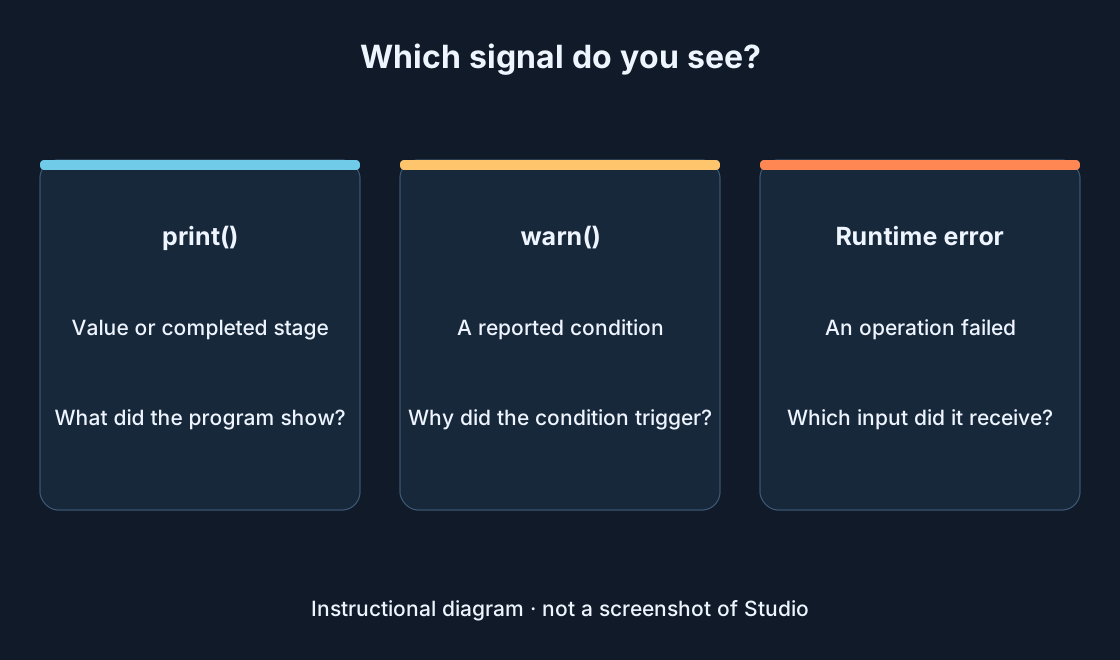
If a checkpoint fails, move from structure to state: exact path, SpawnLocation class, ordinary server Script, CanTouch, living Player, expected index and spawn eligibility. A misspelled name and a deliberately rejected second index have different causes. Use the separate Output guide for runtime errors; this lesson does not repeat the full console tutorial. The table contains no “passed” marks. Fill in your own observed results beside the expectations.
In particular, verify that Enabled has not been disabled and Neutral has not changed after startup. The point must remain in Workspace and be eligible for that player. Another script can later change these properties or RespawnLocation. When the destination is wrong, report the action sequence and actual spawn platform rather than only “broken”. Check one correction in a clearly defined new attempt. Endless delays are not a repair for an incorrect order condition.
| Case | Expected state | Check |
|---|---|---|
| New Test / join | 0; Start | Actual initial spawn |
| Checkpoint1 then death | 1; Checkpoint1 | Wait for a new character |
| Checkpoint1 again | Unchanged | Different body-part contacts |
| Checkpoint2 after first | 2; Checkpoint2 | Death returns to second |
| First after second | 2; Checkpoint2 | No rollback |
| Second before first | 0; Start | Skip rejected |
| Cube or non-player model | Unchanged | No matching Player |
| Dead / old character | Unchanged | Health and current Character |
| A progressed, B did not | Independent A/B destinations | Check both after death |
| Leave / Stop and new test | Fresh state 0 | No persistent saving |
11. Save the prototype and choose one extension #
End the test and save the working prototype with a recognizable name. Record its hierarchy, script version, automatic character-loading assumption, completed solo and two-client cases, and expected versus actual spawn locations. The logic review in this article does not mean your project has passed a Studio playtest. Compare the important cases in your own scene before transferring this mechanic into a working game.
A personal checkpoint-confirmation message or an explicit reset button can be the next small extension. Persistent saving is a separate task involving loading, write failures, data versions and reset rules; no DataStore is used here. Do not promise players permanent progress. Preserve the clear current contract first: death returns to the reached point during this visit, and leaving ends this tutorial’s in-memory progress. A reliable small rule is easier to extend than several untested systems added together.
Original sources
Roblox Creator HubRoblox Creator Hub — Player.RespawnLocation
Roblox Creator Hub — BasePart.Touched and CanTouch
Roblox Creator Hub — Studio testing modes
Roblox Creator Hub — Players lifecycle
Roblox Creator Hub — ServerScriptService