Studio / ROBLOX
First daytime lighting in Roblox Studio: lights, atmosphere and readable paths
Plan a small practice scene, separate global lighting from local lights, and compare route readability with one change at a time. Suggested values are starting conditions for later checks, not measured outcomes.
 Open full-size image ↗
1. Give the lighting a concrete job #
Your first target is a readable route: a player can see the obstacle edge, understand the way around it and recognise the finish. Start with a daytime scene without elaborate decoration. Write three questions: where does movement begin, what blocks the direct route, and which object marks the end? Lighting should help answer those questions from an ordinary camera distance, rather than only in a carefully enlarged editor image.
This is a plan for your own practice prototype; the proposed settings still need observation. Do not transfer them unchanged to a large level. If the finish is identifiable only by colour, add a shape, such as a tall post with a broad top. If the obstacle merges with the floor, separate their silhouettes and materials first. Lighting is easier to judge when geometry already explains the route instead of asking the player to guess an invisible passage.
2. Prepare three points on a simple floor #
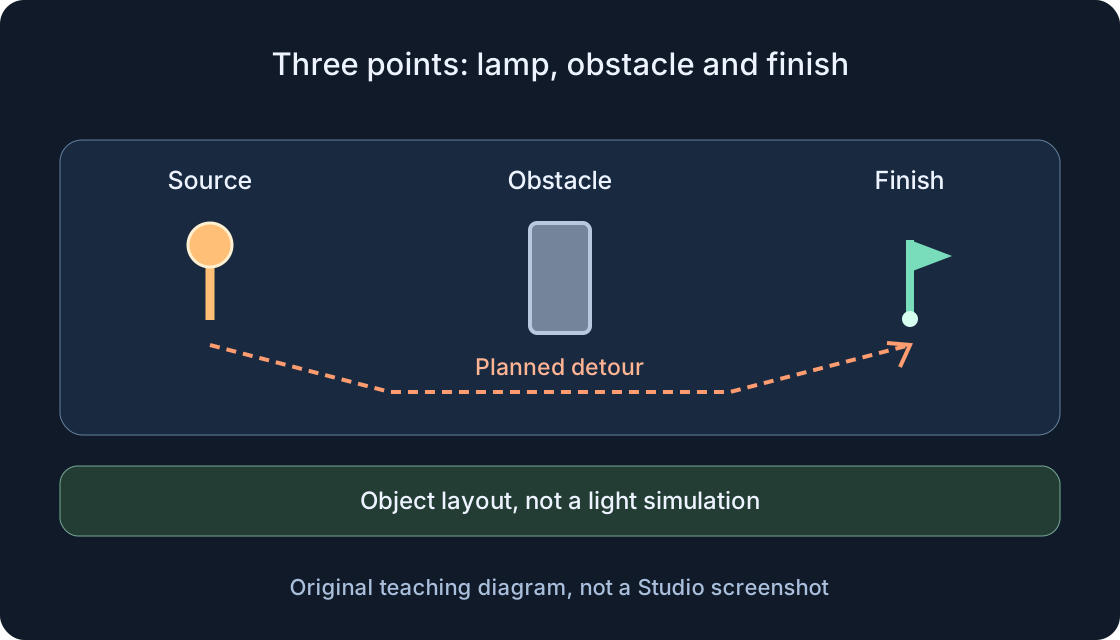
In a separate practice place, prepare a flat floor and three anchored objects named Source, Obstacle and Finish. Suggested positions along one axis are Source at (-8, 6, 0), Obstacle at (0, 3, 0) and Finish at (10, 1, 0), in studs. An obstacle size of (2, 6, 6) is a possible starting shape; leave enough floor around it for a detour. These dimensions support a comparison, rather than define a mandatory level layout.
Choose and record a viewing position on the Source side. Do not move the camera accidentally between variants. Also look at the detour from the side: the obstacle may hide the marker in a straight view regardless of lighting. Use simple opaque materials and distinct shapes, then keep your own reference view. The first diagram represents the layout and intended detour. It is neither a light simulation nor an image of a scene already tested in Studio.
3. Use the current Lighting controls #
Select Lighting in Explorer and inspect it in Properties. The current style choice is LightingStyle, with Realistic and Soft options. Realistic is proposed for the first variant; if Soft better fits your art direction, record that choice and restart the comparison from that baseline. Do not look for an essential recipe through Technology: that setting is deprecated, including the older Unified route.
Record PrioritizeLightingQuality separately. It expresses a preference between nearby lighting quality and viewing distance as rendering quality decreases, rather than guaranteeing faster play. Keep its existing value fixed for now. An older lesson mentioning Future or ShadowMap needs interpretation before you transfer its advice into current controls. For the first scene, choose a visual intention and maintain comparable conditions instead of hunting for a secret engine combination or changing dozens of unrelated switches.
4. Set the time and hold the sun conditions steady #
Propose ClockTime = 13 in Lighting as your daytime starting point. Check the linked TimeOfDay value: it should correspond to 13:00:00. These are two representations of scene time, not your computer clock. Time does not advance automatically; a day and night cycle would require a separate mechanism that this practice does not include.
Record GeographicLatitude without changing it alongside time, because it also affects the sun position. First inspect which side of the obstacle receives light and where the darker area falls. A later comparison could use ClockTime = 16 while preserving everything else. Compare the readability of the edge instead of declaring one hour best for all games. Restore the initial time afterward, so the following exercises refer to the same conditions and you can explain any visible difference.
5. Record the global baseline #
The first table offers starting settings, not measurement results. Lighting.Brightness concerns the global sun and moon; the property with the same name on a lamp concerns that lamp. ExposureCompensation = 0 provides a useful reference point. Record existing effects too, and avoid introducing blur or glow while making the first route assessment.
Ambient contributes to areas occluded from the sky, while OutdoorAmbient concerns exposed areas with global shadows enabled. The proposed grey pair keeps the latter brighter than the former. RGB here means values in the colour field, not a decimal Color3 code expression. If everything becomes a pale patch, restore the baseline and compare the materials. Raising brightness, exposure and ambient illumination together makes it difficult to identify why detail disappeared. Keep a short record so you can return to the earlier version without reconstructing it from memory.
| Object / property | Proposed starting value | Why record it |
|---|---|---|
| Lighting.LightingStyle | Realistic | Baseline visual style |
| Lighting.ClockTime / TimeOfDay | 13 / 13:00:00 | One scene time |
| Lighting.Brightness | 2 | Comparable global brightness |
| Lighting.ExposureCompensation | 0 | Reference exposure |
| Lighting.Ambient | RGB (70, 70, 70) | Ambient in occluded areas |
| Lighting.OutdoorAmbient | RGB (125, 125, 125) | Ambient in exposed areas |
| Lighting.GlobalShadows | true | Global shadow condition |
| PointLight | Brightness 1.5; Range 12; Enabled true; Shadows true | A single local source |
| Atmosphere (if present) | Density 0; Haze 0; Glare 0 | Clear atmosphere reference |
6. Add a single PointLight #
Prepare an Attachment at the intended point on Source and insert a PointLight into it, keeping that hierarchy within Workspace. Select the light itself in Explorer. Proposed initial settings are Enabled = true, Brightness = 1.5, Range = 12, white Color and Shadows = true. PointLight emits around a point, making it a simple option for this practice lamp without a directional beam.
Compare it enabled and disabled from the same position first. Its contribution may be subtle in daylight; that observation alone does not show a broken light. Range is a distance in studs, and increasing Brightness does not expand it. In the proposed layout Finish is farther from Source than this initial radius, so do not expect the lamp to illuminate the entire route. If you need a different reach, change Range separately and record what you actually see without moving the source.
7. Compare directional alternatives #
For another variant, disable PointLight and insert SpotLight directly into the Source BasePart. It directs light through a cone; Angle = 60 and Range = 12 are proposed starting values. Here Face selects a side of Source; check that side and the part orientation. With separate Attachment parenting, Face selects its axis, so its orientation matters too. Do not compensate with brightness before checking whether the light is facing the route at all.
Try SurfaceLight on a flat panel as a separate comparison. Insert it into the panel BasePart and choose the appropriate Face; in this placement it emits from the surface rather than one point. The API also permits Attachment placement, where behaviour resembles SpotLight, but keep the panel for this exercise. Test the alternatives sequentially with one active source. Enabling all three together makes it difficult to explain which light revealed the obstacle edge and which merely added a bright patch to the view.
8. Separate Neon appearance from a light source #
A Neon material can make the finish marker look luminous, but it does not by itself illuminate the neighbouring floor like PointLight. Make a separate comparison: the ordinary Finish material, then Neon, with the lamp unchanged. Observe both the marker and the adjacent surface. An object that looks glowing and actual local illumination are different jobs; the latter needs a suitable light source.
Do not let a bright marker replace checking the hazardous edge. A player should still recognise the obstacle and detour when decorative glow appears weaker on another device. If you want a luminous sign that also lights its surroundings, plan the sign material and its lamp separately. Write each purpose: recognising the finish and seeing a floor section. That small design agreement lets you change decoration later while preserving navigation, instead of treating an attractive picture as proof that the route is understandable.
9. Introduce Atmosphere after the route is clear #
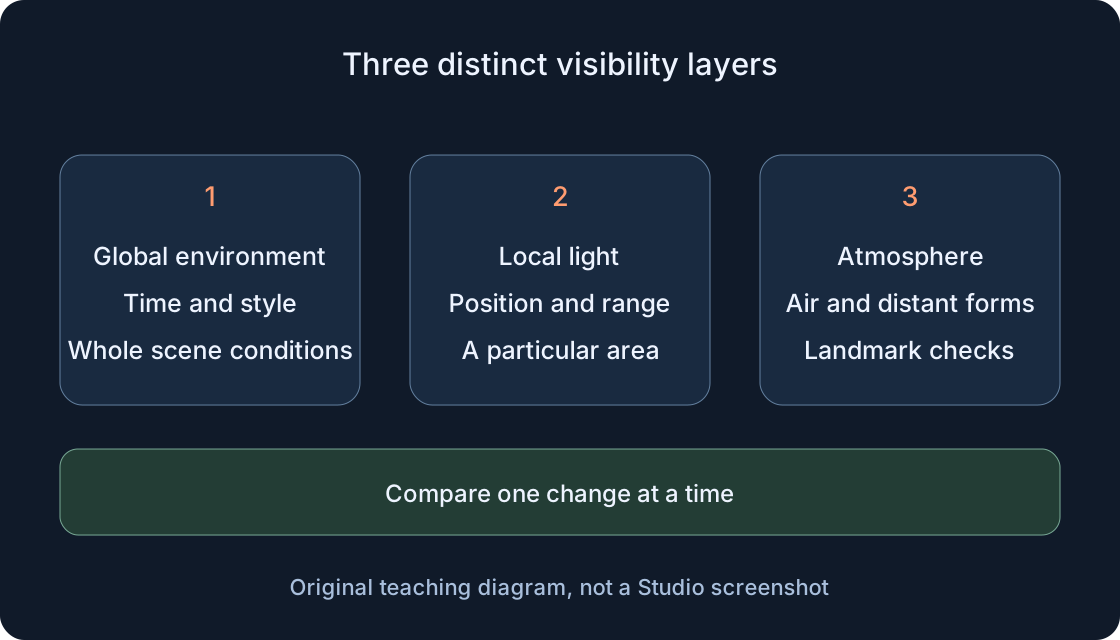
If Lighting contains Atmosphere, suggested clear-reference settings are Density = 0, Haze = 0 and Glare = 0. Record its other properties and hold them fixed first. In a separate comparison, try Density = 0.2. Watch whether Finish remains distinguishable and whether the distant section merges with the background. These values define future comparison conditions, rather than guarantee visibility.
Density influences the obscuring of objects, while Haze controls atmospheric haze; neither replaces a lamp Range. Ordinary Fog properties are hidden when Atmosphere is present in Lighting, so there is no general conversion from Density to FogEnd to follow here. Do not alternate both approaches through random recipes. Complex Glare and Decay work is unnecessary for the first version. If atmosphere conceals an essential passage, reduce its contribution or adjust the landmarks before trying progressively brighter lamps to overcome every visibility problem.
 Open full-size image ↗
10. Judge visibility from the player position #
Return to the recorded viewpoint on the Source side, then follow the intended detour and look towards Finish. Distinguish three observations: geometry hides the marker, an edge is too dark, or a distant form disappears into atmosphere. Each suggests a different next comparison. A hidden marker often needs a height or position change rather than more light behind a wall.
Plan a later check at lower rendering quality and on a physical phone. Do not encode an essential instruction only in a delicate shadow, because rendering details can differ. Ask whether the direction is understandable, rather than whether every pixel matches. If the editor and a gameplay session look different, record the current properties and check whether project logic changes them. One view of your prototype does not establish how all Roblox scenes or devices behave. Keep the visual purpose separate from performance conclusions.
11. Compare without inventing results #
The second table leaves actual results empty. Before each row, restore the baseline and change only the listed property or variant. A short report can contain the date, camera position, observation and next step. Replace a vague statement such as “lighting fixed” with something concrete, such as seeing the left obstacle edge from the entrance and recognising the marker after the detour, but only after actually checking it.
If an improvement appears only from a new viewpoint, record that camera movement separately. Do not attribute it to a setting changed at the same time. For a test with another person, ask them to find the finish without a spoken hint and record where they hesitate. A later device check cannot be replaced by looking at a diagram or editor reference image. Keep an unperformed row blank, and limit each conclusion to the conditions that were actually observed.
| Variant | One change from baseline | Check question | Actual result |
|---|---|---|---|
| A | None: baseline conditions | Is the edge visible and detour clear? | |
| B | PointLight.Enabled = false | Which area depended on the lamp? | |
| C | PointLight.Range = 20 | What changes at the same brightness? | |
| D | One alternative light | Where does SpotLight / SurfaceLight point? | |
| E | Atmosphere.Density = 0.2 | Is Finish distinct from the same viewpoint? | |
| F | Another device or quality | Is the route clear under recorded conditions? |
12. Save the scene and hand over a clear record #
Save the practice place separately and record the variant: three object positions, time, style, active light and Atmosphere settings. On the next opening, inspect the state, including TimeOfDay, before continuing the comparison. Saving a project, publishing an experience and checking a gameplay client are separate stages. You do not need to publish simply to begin setting up daylight in this lesson.
For another developer, supply the route goal, baseline, one change and the actual observation, if one exists. Identify checks still waiting to be performed. Choose the next task according to the problem: route readability, a level playtest or a device comparison. Do not present suggested numbers as a universal standard or move an unchecked diagram into a finished game without evaluation. A useful first outcome is a repeatable plan and a clear route that you can examine step by step.
Original sources
Roblox Creator Hub — Global lighting and current style controlsRoblox Creator Hub — Lighting API
Roblox Creator Hub — Technology deprecation
Roblox Creator Hub — LightingStyle options
Roblox Creator Hub — Local light sources
Roblox Creator Hub — PointLight range
Roblox Creator Hub — SpotLight direction and angle
Roblox Creator Hub — SurfaceLight parenting and emission
Roblox Creator Hub — Atmospheric effects
Roblox Creator Hub — Atmosphere and Fog interaction
Roblox Creator Hub — Neon appearance and separate illumination