Studio / ROBLOX
Two players in Roblox Studio: organize a useful test
Plan a teaching simulation with two clients and separate observations from A, B and the server. Record the starting state, personal and shared results, nearby actions, retries, respawning and a fresh session.
 Open full-size image ↗
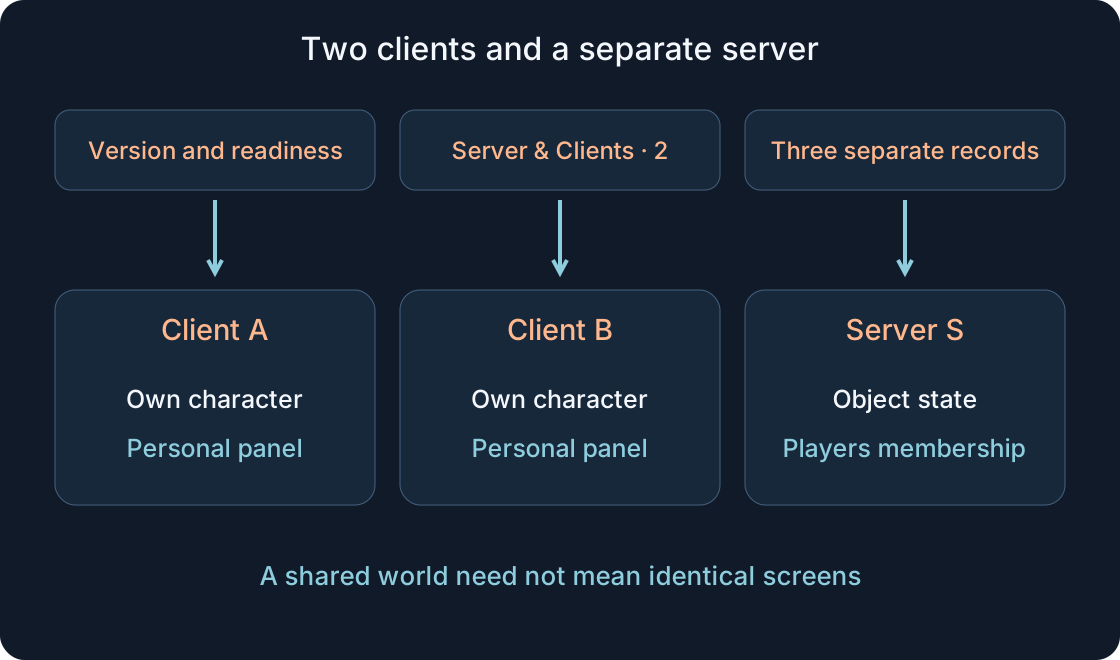
One run, three viewpoints #
Two characters standing together do not prove that a multiplayer mechanic works. Client A might display an attractive result, client B might show the old object, and the server might hold another state. This guide organizes observations. It does not build a reward system or supply a universal RemoteEvent defence.
Use a separate teaching copy of your project. A simple scene with a spawn location is enough to check launching; test an interaction only if it already exists. Choose one shared object and one personal interface element from your prototype, where available. Do not invent a new rule halfway through an observation. Neither Studio nor the author's five games was run for this article. What follows is a procedure and an unfilled record, not evidence of a completed test.
1. Write a case passport first #
Record the project version, mode, two clients, chosen object and readiness condition. Readiness might mean that both characters have appeared and can move, the shared object is present, and the required panel is available. Define the object's starting value from your implementation and the positions of A and B. An unknown starting value must be established, not replaced with whatever colour happens to appear.
Separate expected behaviour from observation. “A changes the shared object; B sees the change” is a requirement, not proof. A personal help panel might belong only to A; decide that beforehand too. Specify permitted repetition and a way to restore the baseline. One action suffices for the first pass. Several changing menus and tasks obscure the cause of a disagreement.
2. Match the mode to the question #
A solo Test/F5 inserts a character; Run/F8 runs without one. A two-client check needs Server & Clients. Current documentation places testing controls on the left of Studio's mezzanine. Follow that documented layout rather than searching for an old tab named in an unrelated tutorial.
A solo run helps inspect readiness. Its Client/Server toggle changes the viewpoint within that solo test; it does not create another player. Server & Clients provides the separate client sessions needed here. Team Test is a different workflow involving collaborators, unnecessary for this local exercise. Choose the question before choosing the mode. The mode table explains what each selection can contribute without calling every running scene a multiplayer check.
| Mode | Purpose of this pass | Boundary |
|---|---|---|
| Test / F5 | Solo readiness with a character | Does not create a second player |
| Client / Server within a solo test | Two sides of the same solo run | Not two independent client sessions |
| Run / F8 | Run the scene without a character | Not a substitute for two players acting |
| Server & Clients · 2 · Play/F7 | Two clients and a server for the A/B/S log | Local simulation, not a public game |
3. Launch exactly two clients #
Select Server & Clients in the testing dropdown, choose 2 clients, then press Play or F7. Studio opens separate sessions: a simulated server and a session for each client. Wait until launching finishes before acting. The original editing window is not an additional player, and counting windows alone is not a reliable check.
Label the clients A and B in your notes and the server S. Establish which character each client controls; inspect the server's Players service for the two Player instances. If the service is hidden in Explorer, use its context menu's Show Services… option. Write the test player names as they actually appear. Do not promise Player1/Player2 names or real user accounts. An incomplete launch must be corrected before the scenario starts.
4. Set up observation, not a new script #
Open Explorer and Output through Window; current documentation also lists their toolbar buttons. Explorer helps inspect a particular object and its values. Output shows errors and messages already produced by the project. Show Context, Show Timestamp and, where useful, Show Source help retain the origin of an entry. This lesson requires no added script.
Every record needs a side: A, B or S. LocalPlayer refers to the current client; the server deals with the session's players. An unnamed “player” is too ambiguous. Do not filter away an error before recording it. Silence in Output does not establish that no operation occurred: the prototype might print nothing. Mark missing evidence honestly and consider diagnostic changes after the original pass.
5. Capture three starting states #
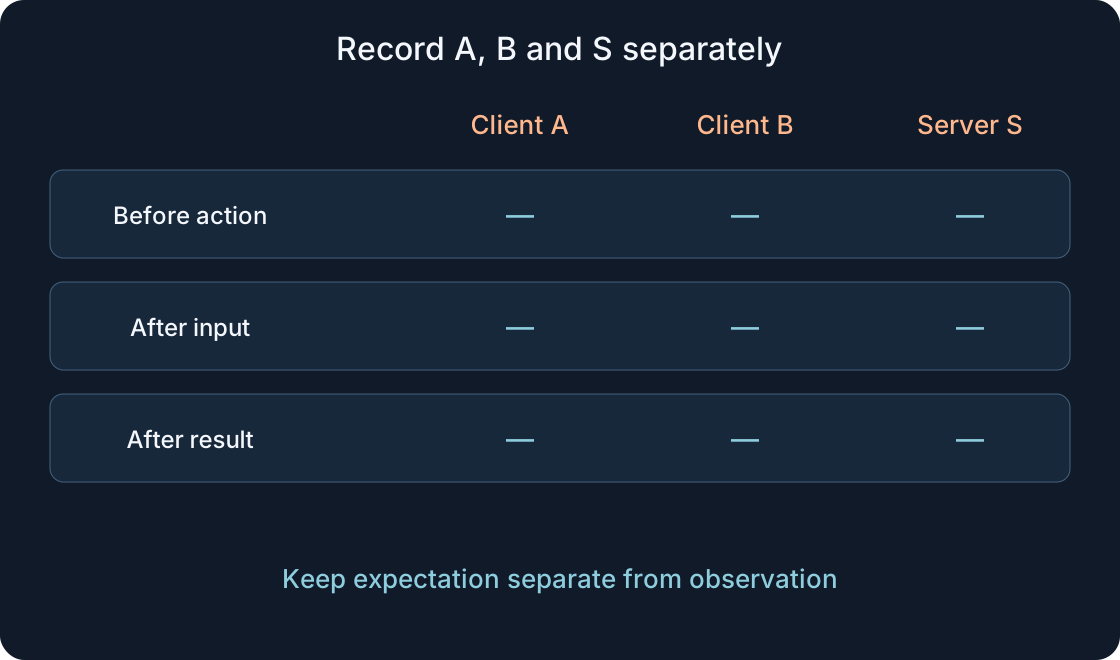
Before the first input, make three independent entries. A: character position, visible object and personal panel. B: the same information from B's viewpoint. S: the relevant object and server value, Players membership and available log. Never copy the server's value into B's observation cell as though B saw it.
A shared result need not produce identical images. Cameras, local panels and available regions may differ. With streaming, a distant object absent from a client is not immediately a fault. Prepare comparable observation conditions: place both characters near the selected object and record what is genuinely available. Moving the object through server Explorer midway to obtain a preferred picture would be a separate intervention with another baseline.
 Open full-size image ↗
6. Take turns before approaching conflicts #
Have A perform one predefined action while B only observes. Record A's interface reaction, the server state and B's visible result. Stop to compare all three with the requirement. Record a disagreement before fixing code; otherwise the observation and conclusion refer to different versions.
Restore the agreed baseline and reverse the roles. B acts while A observes. The object does not have to look unchanged everywhere: a shared rule may intentionally affect both clients. Conversely, opening a personal help panel at A should not open B's panel if the chosen rule is local. Both outcomes belong to your specification. A two-client view is useful because it tests that distinction, not because it demands identical screens.
7. Describe close actions precisely #
Next, prepare a case where A acts and B follows promptly. Repeat from the baseline with the order reversed. Write down the actual input order. One person switching windows cannot guarantee requests arriving in the same server tick. Call these closely spaced actions, not proven simultaneity.
The expected conflict policy belongs to the existing mechanic: perhaps one change is permitted, perhaps actions queue, perhaps the second is rejected. State that policy without inventing it for this article. If B sees a changed object after A, that alone is not a failure. Compare the observed sequence to the chosen rule. Strict timing needs a separately controlled case. Two quick presses do not establish that every possible race has been tested.
8. Separate late replies from repeated actions #
When the existing implementation identifies a request and its result, record that association. Check whether a late reply overwrites the display for a newer, different action. A missing result is unknown, not automatic rejection. Repeating an input safely depends on the mechanic's actual contract, not the presence of a convenient button.
Use Network Simulator only in a separate controlled pass and record both directions' settings. It is a beta Studio tool; consult current availability instructions. Choosing a preset stages values; Apply activates them. Slow window switching is not simulated network delay. Afterwards restore and apply the recorded baseline: Reset stages Ideal Fiber, not zero delay. The tool does not change published players' connections. If responses cannot be associated, record that observation limit instead of promising a safe retry.
9. Respawning stays within the session #
After a clear baseline pass, respawn A's character using the teaching project's existing method. Record changes at A, what B sees and what remains at S. A new Character is not a newly joined Player. CharacterAdded relates to character spawning or respawning; it does not guarantee retained panels, tasks or game state.
Wait for the readiness condition again before acting. Depending on the implementation, old character references or local elements may need refreshing. We add no code or repair here; we identify a reproducible case for the developer. Do not call respawning a new visit or substitute a full session stop. If the project disables ordinary character loading, use its implemented mechanism rather than assuming automatic respawning works in every project.
10. Ending a session is not saving a file #
For Server & Clients, use End Session from any simulation session after recording observations. It closes all simulated clients and the simulated server. Solo Stop ends its test and resets objects to their pre-test state. Closing one window or pausing is not a universal substitute for ending the whole check.
Return to the original editing project. For a local copy, use File → Save to File if you changed authoring material. That is not player-progress storage. Runtime world changes do not automatically become file edits. A fresh run needs a fresh baseline record. If the prototype uses external persistence, restarting alone does not promise clean data; investigate that separately. Keep the observation log outside the project so the sequence survives the stop.
11. Hand over a reproducible, bounded result #
A useful record contains version, client composition, baseline, exact inputs, A/B/S roles, expected behaviour and actual observations. For a discrepancy, include any available error with context and say whether the same start reproduced it. “Works” without these conditions gives another developer no dependable way to repeat the check.
Official sources and article structure were checked; our diagrams are plans, not Studio screenshots. No live test was performed for this guide. A local simulation does not prove physical-phone behaviour, a public server or every network condition. After a fix, repeat the specific failing case and its baseline pass. Real devices and the required deployment environment follow as separate stages. A small precise log makes the two clients useful viewpoints rather than merely extra windows.
| Case / input | Predefined criterion | A: observed | B: observed | S: observed |
|---|---|---|---|---|
| Baseline: both ready | Record actual availability and value; compare with the case passport | — | — | — |
| A acts, B observes | Changes follow the shared rule; keep observations independent | — | — | — |
| B acts, A observes after reset | Repeat with the initiator reversed | — | — | — |
| A opens personal panel, if present | With a local rule, B’s panel remains closed | — | — | — |
| Quick A → B, then separate B → A | Record order; compare to the defined conflict policy | — | — | — |
| Retry and late reply: separate pass | Associate request/result; do not replace another newer operation | — | — | — |
| A respawns within the session | Check readiness, Character and required state | — | — | — |
| End Session and fresh launch | New composition/baseline record; do not assume clean external data | — | — | — |
Original sources
Roblox Creator Hub — Studio testing modesRoblox Creator Hub — Client-server runtime
Roblox Creator Hub — Players
Roblox Creator Hub — Player
Roblox Creator Hub — Explorer
Roblox Creator Hub — Output
Roblox Creator Hub — Network Simulator
Roblox Creator Hub — Place files