Studio / ROBLOX
How to inspect a Toolbox model in Roblox Studio
A practical fictional lantern example: asset identity, Explorer contents, scripts, dependency permissions and package updates. Start in a separate learning project.
 Open full-size image ↗
Choose a job before choosing a model #
Imagine a small practice courtyard with an arch and a lantern beside its entrance. The arch marks a passage and the lantern provides steady light. It does not award coins, open a shop or monitor players. This fictional example gives us a clear reason to choose a resource and a clear reason to leave unnecessary features behind.
Before searching, write “I need a stationary decorative lantern with constant light.” A rotating mechanism, day-and-night system or entire building pack is then an extra requirement, rather than something you accidentally accept. A Toolbox model can be a useful starting point, but its name and thumbnail do not describe everything inside. Judge the candidate by its purpose, contents and conditions of use, as well as how it looks.
Prepare a separate project and a baseline #
Use a separate learning project for the first inspection, rather than a working game containing saved player data, purchases and important settings. Save the clean starting scene to your own file. Add a simple floor and an arch made from your own parts, giving you a useful reference for scale and placement.
Record what is already present in Explorer before inserting anything. If an unexpected object appears later, you will have something to compare it against. Do not run an unfamiliar model just to discover what it does. Inspect it in edit mode first. A separate project limits the consequences of mistakes in your main scene, but it is not itself a technical sandbox and does not restrict executable code’s capabilities.
Find the exact asset, not a similar picture #
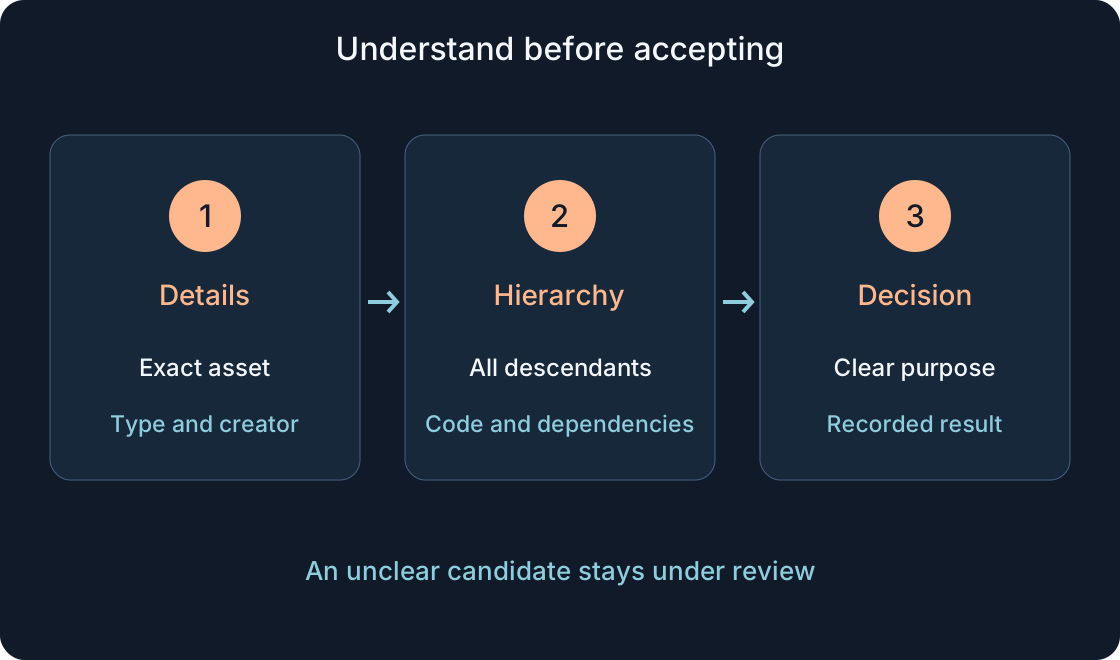
Open Toolbox through the Window menu or Home toolbar. Choose the model category and enter a descriptive search such as lantern. You can refine the creator filter when useful. Select one candidate instead of adding several similar results, and examine its details before inserting it.
Check the Creator Store entry’s type, creator, description, update information and available technical details. Keep its exact URL or identifier. For this example, the useful question is “Is this decoration alone, or does it also implement behaviour?” Community ratings can help you choose a candidate, but they do not prove safety. If its description advertises systems you do not need, continuing the search may be easier than extracting one light from a large kit.
Model, mesh, decal and plugin are different #
People sometimes call every attractive object a model, but the resource type changes how you use it. A Model groups objects in the scene hierarchy; it can contain parts, lights, nested groups and code. A MeshPart represents a piece of geometry, while a decal image belongs on a surface rather than supplying an entire lantern assembly.
A plugin extends Studio itself and is installed separately. You usually do not need one to place this decorative lantern. A package adds a connection to a versioned asset, not simply another appearance. Use the table to decide what kind of candidate fits your job before insertion. It does not mean that every resource of a particular type has identical contents. You still need to inspect the actual hierarchy.
| Resource | Meaning here | Check |
|---|---|---|
| Model | Grouped objects; contents can include behaviour | Entire hierarchy, not only the shell |
| MeshPart / mesh | Part geometry, not necessarily a complete system | Actual object and dependencies |
| Decal | Image on a surface | Image, surface and access |
| Plugin | Studio extension installed separately | Whether the task needs it at all |
| Package | Objects with package connection and versions | PackageLink, version and AutoUpdate |
| Ordinary static model | Our selected design without required code | Light, placement, collisions, dependencies |
Insert one copy and expand Explorer #
When a candidate fits the task, insert one copy by clicking or dragging the asset into the scene. Find the new group in Explorer and expand its branches all the way down. Look at instance classes, not merely names: an object called “Decoration” might still be a script.
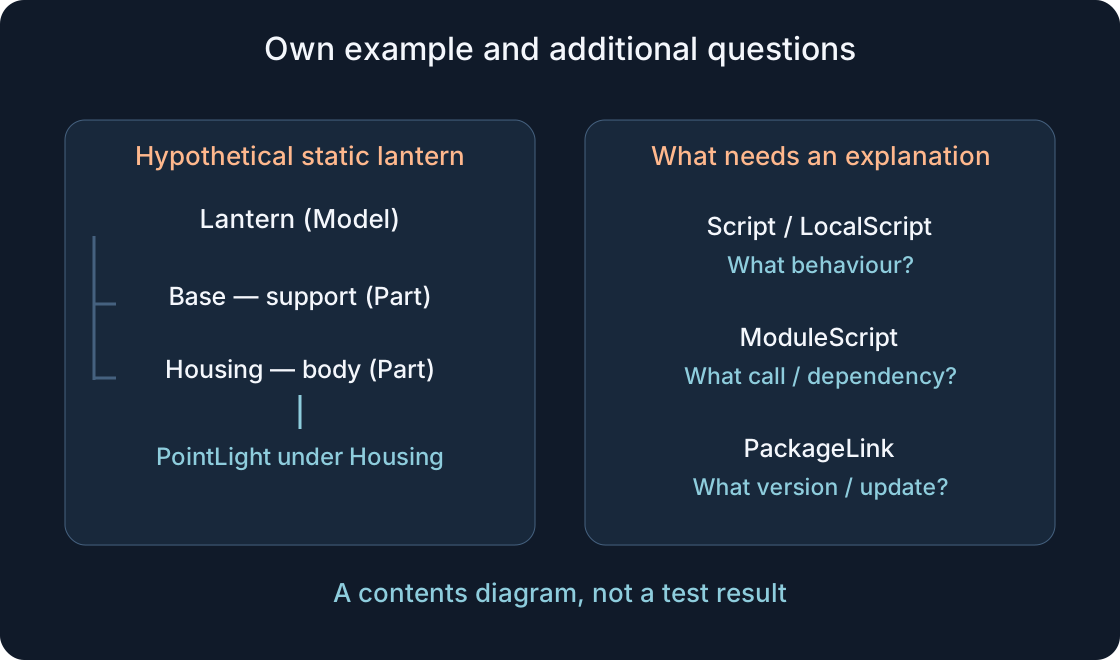
For our own hypothetical lantern, expect a Model containing a base, a housing and a PointLight under a suitable part. Record differences in a real candidate: audio, joints, interface elements, other models or PackageLink. Also compare the surrounding hierarchy after insertion. Until you can explain unexpected contents, keep the resource out of the working game. Your original saved file is a comparison and recovery point, not evidence that every insertion has been accepted.
 Open full-size image ↗
Separate appearance from executable behaviour #
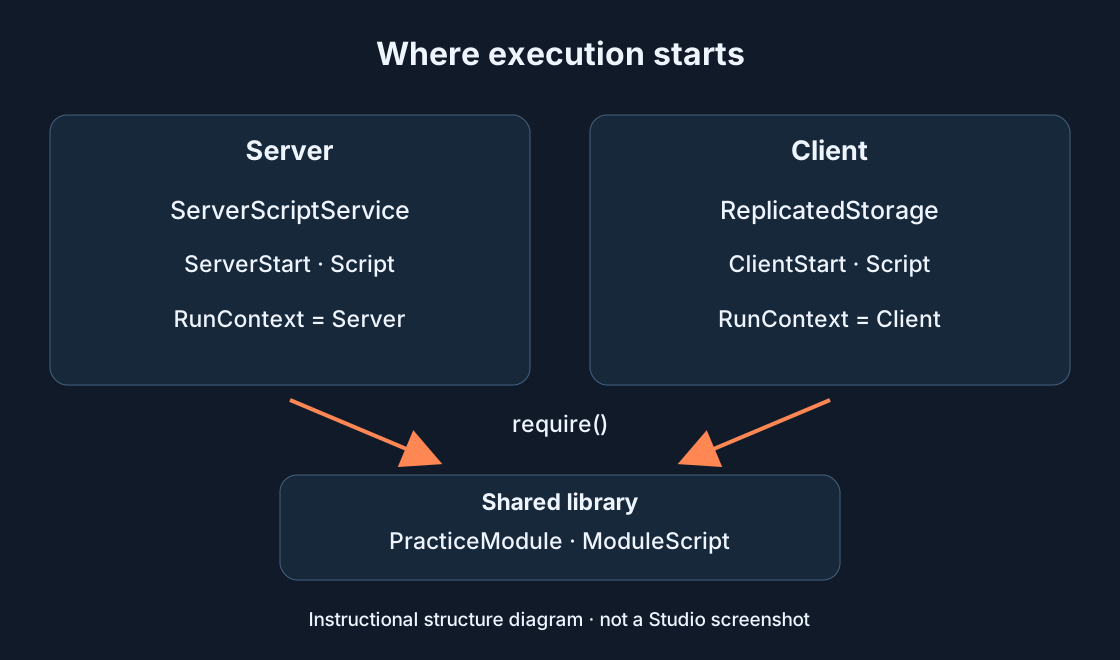
Look separately for Script, LocalScript and ModuleScript throughout nested branches. Script and LocalScript can execute behaviour in an appropriate context; ModuleScript contains code called through require. A stationary appearance in edit mode therefore tells you little about what a discovered module is intended to do.
Our constant-light example does not call for code. Finding scripts in a candidate is a reason to understand their role, rather than proof of malicious intent. Toolbox documentation provides Disable Scripts in the Explorer context menu when you want to use an object without running its scripts. Inspect the contents again afterwards. Do not turn disabling scripts or removing one suspicious object into a promise of complete safety: dependencies, updates and other properties still require their own decisions.
Questions to ask while reading outside code #
If you actually need the model’s behaviour, describe that behaviour first: what it changes, when it starts and which systems it interacts with. Compare that job with readable source code. The goal is to understand the boundaries of the resource, rather than search for a magical forbidden word that supposedly settles the entire review.
An unexplained external loader, concealed long fragment or access to systems unrelated to the lantern leaves a question open. Do not execute code to decode its intentions. Ask its creator for an explanation or choose a simpler alternative. A module loaded using an asset identifier is another dependency; its name alone does not explain its contents. A beginner can postpone a functional model without losing the lesson: ordinary parts and a light meet our practice requirement.
Sandboxing and capabilities form another boundary #
Script capabilities are an experimental beta feature. The documentation describes Workspace.SandboxedInstanceMode set to Experimental, and a container’s Sandboxed and Capabilities properties. Restrictions concern script actions inside the container; they are an additional boundary, not a certificate saying that the model has been reviewed.
Do not grant every capability simply to make an error disappear. Establish which particular function needs access and why. If the properties are unavailable in your Studio version, or the meaning of a permission is unclear, leave that question unresolved rather than follow an invented universal menu route. Independently operating objects still need inspection: lights and physical elements do not stop functioning merely because scripts are restricted. For the static example, leaving out unnecessary code is the simpler design choice.
PackageLink: updating is not Duplicate #
Check for PackageLink. Its AutoUpdate concerns receiving new package versions; duplicating an ordinary unlinked model merely creates another instance. Do not treat Duplicate as a command that removes a package connection. After copying, inspect whether PackageLink remains and what its properties say.
Before approving a package, record its selected version and your update decision. For a learning review, consciously control AutoUpdate so a newer version does not silently replace the object of inspection when the place is reopened. Compare changes before moving the resource into a working project. Do not delete PackageLink merely to tidy Explorer: doing so removes that copy’s package functionality. Such a conversion needs its own deliberate decision and saved original copy, rather than becoming an accidental side effect of cleanup.
Check permissions and physical purpose #
A Creator Store listing does not make you the asset’s author or replace dependency permission checks. For Restricted assets, the experience’s own access matters: particular included resources may not display or play at runtime without it. Check exact identifiers and the owner of the destination project, rather than rely on the model’s broad title.
Then inspect scale, position, Anchored and CanCollide on the parts. In our courtyard, a stationary lantern should not fall and a decorative projection should not unexpectedly obstruct the arch. Those are requirements chosen for the example, rather than universal property values for all models. Assess light by how well it reveals the entrance, not by maximum brightness. Change one understandable group of properties at a time so you can trace the result.
Keep expectations separate from actual results #
After you can explain the contents and dependencies, prepare a limited check in the learning scene. Compare appearance in editing first, then plan a Studio session only for a variant you understand and have accepted for that check. Observe part positions, passage through the arch, lighting and new Output messages.
The table below is an empty observation log, not a report of a completed trial. The reviewer must enter actual results, the version and the decision. A brief session does not expose every possible problem or demonstrate suitability for a phone or a complete production map. If behaviour remains unclear, stop and return to the saved starting project. An absence of obvious errors is not permission to move any resource you happen to find into the working game.
| Check | Expected in the learning example | Actual observation | Decision |
|---|---|---|---|
| Identity | URL, creator and selected candidate match | — | — |
| Contents before execution | Each descendant has an explanation | — | — |
| Lantern in scene | Intended position, stability and steady light | — | — |
| Passage through arch | Decoration does not block intended passage | — | — |
| Dependencies / Output | Access explained; new messages investigated | — | — |
| Reopen / package | Version and AutoUpdate match the record | — | — |
Decide and keep an asset record #
The outcome can be straightforward: accept an understandable static model, keep a candidate for further review, or build your own substitute. Record its URL, creator, purpose, contents, dependencies, code, package version and update policy. Include your own modifications and results only for checks that were actually completed.
Revisit the appropriate part of the record after a package update, newly added scripts or a change of destination game owner. The lantern needs useful light and an unobstructed passage, rather than a collection of unrelated systems. A starting asset saves work when its role is understood. Related guides cover script placement, Output messages and level-test planning separately; none of them automatically validates the particular model you choose. Carry that distinction into the next resource review too.
Original sources
Roblox Creator Hub — ToolboxRoblox Creator Hub — Creator Store
Roblox Creator Hub — Models
Roblox Creator Hub — Meshes
Roblox Creator Hub — Textures and decals
Roblox Creator Hub — Studio plugins
Roblox Creator Hub — Explorer
Roblox Creator Hub — Script types and locations
Roblox Creator Hub — Third-party asset vulnerabilities
Roblox Creator Hub — Script capabilities
Roblox Creator Hub — Workspace
Roblox Creator Hub — Packages
Roblox Creator Hub — PackageLink
Roblox Creator Hub — Asset privacy
Roblox Creator Hub — BasePart